Introduction
Have you ever experienced the joy of baking something that fills your home with warmth and tradition? I remember the first time I made my very own easter bread recipe. The scent of fresh dough mingling with citrus hints, the gentle hum of the oven, and the smiles of my loved ones as they tasted the first slice—all of these moments created memories I cherish. Today, I invite you to join me in recreating this heartwarming tradition. Whether you are a seasoned baker or a beginner in the kitchen, this guide will lead you step by step through an unforgettable baking experience.
Table of contents
- Introduction
- Why You Should Try This Easter Bread Recipe?
- History and Tradition Behind Easter Bread
- Ingredients Overview for the Easter Bread Recipe
- Essential Kitchen Tools and Preparation Tips
- Step-by-Step Guide to Making the Easter Bread Recipe
- Tips and Tricks for an Outstanding Easter Bread Recipe
- Creative Serving Suggestions for Your Easter Bread
- Storing Your Easter Bread: Best Practices
- Conclusion and Call-to-Action
- Frequently Asked Questions (FAQs)
Why You Should Try This Easter Bread Recipe?
This easter bread recipe is not just about baking bread; it’s about celebrating heritage and creating moments of togetherness. You will:
- Enjoy a rich blend of flavors and textures.
- Embrace a centuries-old tradition that symbolizes hope and renewal.
- Create a centerpiece for your family gatherings and festive meals.
- Build lasting memories that you can share year after year.
Every bite of this traditional bread carries a story—a blend of personal memories and cultural significance that makes it so much more than just food.
History and Tradition Behind Easter Bread
A Brief Historical Background
The tradition of baking Easter bread spans many cultures and centuries. In many regions, this bread represents rebirth and the hope of new beginnings. Its aromatic spices, delicate flavors, and unique shapes are a tribute to the celebrations of spring and renewal. As you follow this easter bread recipe, imagine the generations before you who have shared in this festive tradition.

Personal Memories and Cultural Significance
When I was young, my family would gather every Easter to bake our special bread. I remember the gentle guidance of my grandmother as she showed me the art of kneading the dough and the secret behind the perfect rise. This easter bread recipe is more than a list of ingredients—it is a bridge connecting past and present, carrying the legacy of warm family kitchens and joyful celebrations.
Ingredients Overview for the Easter Bread Recipe
The secret to a delicious easter bread recipe starts with quality ingredients. Below is a carefully curated list along with a detailed table to help you prepare:
Essential Ingredients for a Perfect Easter Bread Recipe
| Ingredient | Quantity | Notes |
|---|---|---|
| All-purpose flour | 4 cups | Sifted for a lighter, airy texture |
| Active dry yeast | 2 teaspoons | For that crucial rise |
| Warm milk (about 110°F/43°C) | 1 cup | Helps activate the yeast |
| Granulated sugar | 1/4 cup | Balances the flavors with a touch of sweetness |
| Salt | 1 teaspoon | Enhances overall taste |
| Unsalted butter | 1/4 cup | Melted and cooled to combine smoothly |
| Eggs | 3 large | At room temperature for better blending |
| Lemon zest | 1 tablespoon | Provides a refreshing citrus note |
| Vanilla extract | 1 teaspoon | Deepens the flavor profile |
| Optional: Raisins or dried fruits | 1/2 cup | For extra texture and a burst of natural sweetness |
Optional Ingredients for Enhanced Flavor
You can add a creative twist by including:
- Chopped nuts: Almonds or walnuts for crunch.
- Spices: A dash of cinnamon or cardamom to warm up the flavor.
- Herbs: A sprinkle of rosemary for an aromatic touch.
Including these optional ingredients will personalize your easter bread recipe while adding layers of flavor and texture.
Essential Kitchen Tools and Preparation Tips
Must-Have Equipment
Before you dive into the recipe, ensure your kitchen is well-equipped with these essentials:
- A large mixing bowl
- A wooden spoon or spatula
- Measuring cups and spoons
- A baking sheet or loaf pan
- A clean kitchen towel for covering the dough
Organizing Your Workspace for Success
A tidy workspace makes baking more enjoyable and efficient. Lay out all your ingredients and tools before starting. Preheat your oven to 375°F (190°C) so it’s ready once your dough is perfectly proofed. Taking these small steps ensures a smoother baking process and a stress-free kitchen environment.
Step-by-Step Guide to Making the Easter Bread Recipe
Activating the Yeast
Start by combining warm milk (around 110°F) with a pinch of sugar and the active dry yeast in a small bowl. Stir gently and let it rest for about 5 minutes until it becomes frothy. This step is vital to ensure your easter bread recipe achieves a light and airy texture.

Mixing the Ingredients
Creating the Perfect Dough
- Combine Dry Ingredients:
In a large mixing bowl, whisk together the sifted flour, granulated sugar, and salt. This helps to evenly distribute the ingredients. - Mix Wet Ingredients:
In a separate bowl, beat the eggs and then add the melted butter, lemon zest, and vanilla extract. Stir well until everything is combined. - Integrate the Yeast Mixture:
Once your yeast mixture is frothy, add it slowly to the wet ingredients, stirring continuously. - Form the Dough:
Gradually incorporate the dry ingredients into the wet mixture. Mix until a soft, sticky dough forms. If you’ve chosen to add raisins or dried fruits (or any of the optional ingredients), fold them in at this stage. This hands-on step makes your easter bread recipe truly personal and special.
Proofing the Dough
Cover your bowl with a clean kitchen towel and set it in a warm spot for about 1 hour, or until the dough doubles in size. This rest period allows the yeast to ferment and develop those delicate flavors, ensuring your bread is both light and flavorful.
Shaping and Baking the Bread
- Shape the Dough:
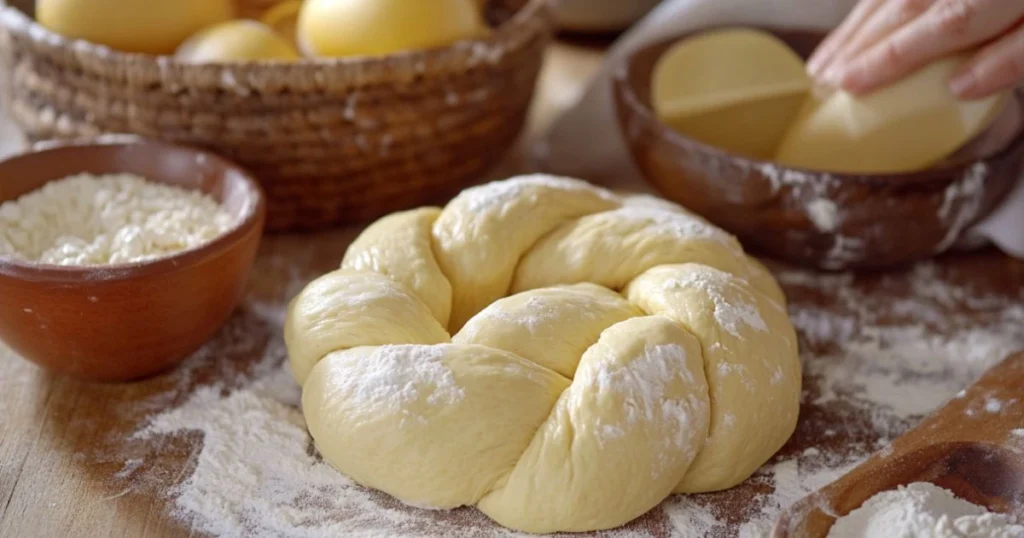
Once the dough has risen, gently punch it down to release excess air. Shape it into a round loaf or create a braided design if you’re feeling creative. - Final Rise:
Place your shaped dough on a lightly greased baking sheet or into a loaf pan. Let it rise again for another 20 minutes to ensure a soft crumb. - Baking:
Bake in the preheated oven at 375°F (190°C) for 25-30 minutes, or until the crust turns a beautiful golden brown. The aroma during this phase is irresistible and signals that your easter bread recipe is nearly complete. - Cooling:
Remove the bread from the oven and let it cool on a wire rack. Cooling prevents condensation, which might make the crust soggy, and allows you to enjoy the best texture and flavor.
Tips and Tricks for an Outstanding Easter Bread Recipe
Common Pitfalls to Avoid
- Over-Kneading:
While kneading is necessary, overdoing it can result in a tough texture. Keep it gentle and consistent. - Cold Ingredients:
Using eggs or butter straight from the fridge can hinder the mixing process. Always allow them to come to room temperature for a smoother blend. - Skipping Proofing Time:
Rushing the rising process will affect the final texture. Patience is key to a fluffy easter bread recipe.
Enhancing Your Easter Bread Flavor
- Add Nuts or Seeds:
For extra crunch, sprinkle chopped almonds or sunflower seeds on top before baking. - Experiment with Dried Fruits:
Mix in dried cranberries or apricots to provide bursts of tangy sweetness throughout your bread. - Infuse with Extra Spices:
A pinch of cinnamon or nutmeg can create a cozy, aromatic note that elevates your easter bread recipe even further.
Creative Serving Suggestions for Your Easter Bread
Enjoying It at Breakfast or Brunch
Start your day with a slice of warm Easter bread. Toast it lightly and spread a thin layer of butter or your favorite jam. The combination of the soft interior and the crunchy exterior creates a delightful texture that is perfect for breakfast or a leisurely brunch.

Pairing Suggestions for a Festive Meal
Your easter bread recipe makes a fantastic side dish at family dinners or festive gatherings. Consider serving it alongside:
- A fresh garden salad
- A hearty soup or stew
- A spread of artisanal cheeses and fruits
The versatility of this bread allows you to get creative with your pairings, ensuring every meal feels like a special occasion.
Storing Your Easter Bread: Best Practices
Short-Term and Long-Term Storage Tips
To keep your Easter bread fresh:
- Room Temperature:
Wrap the bread in a clean cloth or place it in an airtight container. It should stay soft for up to 2 days. - Refrigeration:
If you plan to enjoy your bread over several days, refrigerate it. Reheat in the oven or toaster to revive its texture. - Freezing:
For longer storage, slice the bread and freeze the slices in a sealed bag. Toast or warm them when needed, and you’ll still enjoy the same great taste.
Leftover Ideas to Transform Your Easter Bread
Don’t let any of that delicious bread go to waste! Use leftovers to:
- Make French Toast:
Dip slices in a mixture of beaten eggs and milk, then fry until golden. - Create Bread Pudding:
Turn stale bread into a decadent dessert with a custard base. - Whip Up Croutons:
Cube the bread, drizzle with olive oil, sprinkle with herbs, and bake until crispy. These make a tasty addition to any salad.
Conclusion and Call-to-Action
Baking this easter bread recipe is about more than following a set of instructions. It’s an invitation to celebrate tradition, to create cherished memories, and to add a personal touch to your festive table. I hope you feel inspired to try this recipe, experiment with the ingredients, and share your delightful results with friends and family.
Now, it’s your turn to bring this tradition to life! Gather your ingredients, set up your kitchen, and start baking. I’d love to hear about your experience—share your photos, tips, or any unique twists you added to your easter bread recipe. Leave a comment or post on social media with the hashtag #MyEasterBreadTradition. Let’s celebrate this time-honored tradition together!
Frequently Asked Questions (FAQs)
- Can I use whole wheat flour in my easter bread recipe?
Yes, you can replace some or all of the all-purpose flour with whole wheat flour. For a lighter texture, consider a blend of 50% whole wheat and 50% all-purpose flour. - How important is the proofing time in this easter bread recipe?
Proofing is critical. It allows the yeast to ferment properly, ensuring your bread is soft, airy, and full of flavor. Skipping or shortening this step may result in a denser loaf. - What temperature should my milk be for activating the yeast?
The milk should be warm (around 110°F or 43°C). Too hot, and it can kill the yeast; too cold, and the yeast may not activate properly. - Can I add different dried fruits or nuts to this easter bread recipe?
Absolutely! Feel free to experiment with dried cranberries, apricots, or your favorite nuts. This recipe is versatile, allowing you to tailor it to your taste. - How do I know when my Easter bread is perfectly baked?
The bread should have a golden-brown crust, and a toothpick inserted into the center should come out clean. You can also tap the bottom of the loaf; if it sounds hollow, it is ready.
By following this detailed guide, you now have everything you need to create an exceptional easter bread recipe. Each step is designed to help you succeed, from carefully selecting ingredients to the final, satisfying slice. Enjoy every moment in your kitchen and share the delicious outcomes with those you love. Happy baking!

